This is the second part of an article focused on applying security scanning and remediating a Workload automatically with Ansible.
Part 1: OpenScap and Scap Workbench
Part 2: Using Ansible to automate the scan and remediation process
Your Custom Text Here
This is the second part of an article focused on applying security scanning and remediating a Workload automatically with Ansible.
Part 1: OpenScap and Scap Workbench
Part 2: Using Ansible to automate the scan and remediation process
So, you’re concerned about security on your base workloads, and you need to implement NIST standards?
Read on to discover how to install and use openscap, generate reports, apply remediation and automate the whole shebang!
Part 1: OpenScap and Scap Workbench
Part 2: Using Ansible to automate the scan and remediation process
If you’ve ever run into a scenario where you need Ansible to execute tasks asynchronously, there is a trick to doing this. For my use case, I wanted to provision multiple VMs at the same time, without having to wait for each VM to be deployed synchronously.
For one or two VMs, it’s no big deal waiting for each VM to be deployed one-at-a-time, however, when we’re deploying many more VMs, it takes too long to wait for each VM to be deployed.
For starters, let’s look at the regular task associated with deploying a VM.
As we can see above, the task deploys a VM to vCenter and has a bunch of variables listed. These variables are either loaded from a vars yaml file or passed in as extra-vars.
Now, if we have an array / collection of VM data, used to deploy, we can iterate that array and kick off the same task for every item in the array.
Naturally, this is typically done in a loop, as follows:
loop: "{{ vms_to_deploy }}"
And now, in order to ensure that we kick off each task and associated those tasks with a job, we use the following Ansible functionality:
async: 600
poll: 0
If you want to run multiple tasks in a playbook concurrently, use async with poll set to 0. When you set poll: 0, Ansible starts the task and immediately moves on to the next task without waiting for a result. Each async task runs until it either completes, fails or times out (runs longer than its async value). The playbook run ends without checking back on async tasks.
So, to include this logic in the tasks, the following YAML should help to convey the message:
Looking above, at lines 40-41, we include async: 600 and poll: 0.
Note that we are looping through a collection of objects called vmstodeploy.
Then, from line 46, we are monitoring the status of this job every 5 seconds (implied by delay: 5).
Of specific importance is line 50 - until: deployment _status.finished.
This means that Ansible will check the status of the job every 5 seconds, 100 times, and then either pass or fail.
Hopefully this helps - it helped me a great deal!
I’ve been trying to figure out a way to enable editing my Workflow and Action code straight from within VSCode, without having to use Buildtools, Maven and the relatively complex process associated.
Typically, vRO stores all of its assets as XML files. This makes it difficult to plug straight into a repo and auto-lint and analyze and auto-test your code like you would for traditional code repos. Well, in honesty, the build tools from VMware’s PSCoE kinda addresses that issue rather elegantly, encompassing the complexity of dependency mapping and so forth, but I just wanted something simpler - something without the overhead.
Well, there are two ways I could have achieved this. I chose to use the source-control approach. The dependency here is that you have to check your vRO code into some kind of SCM system and the pull that code locally to edit with Visual Studio Code.
The alternative would have been to connect directly to vRO (using the APIs) in order to browse, download, edit and then upload the workflows and actions on the fly. While this could be achieved with relative ease, the issue becomes a different one altogether: conflicts.
Therefore, in writing my VSCode extension, I decided to leave conflict management in the hands of SCM - that’s kinda what it’s built for.
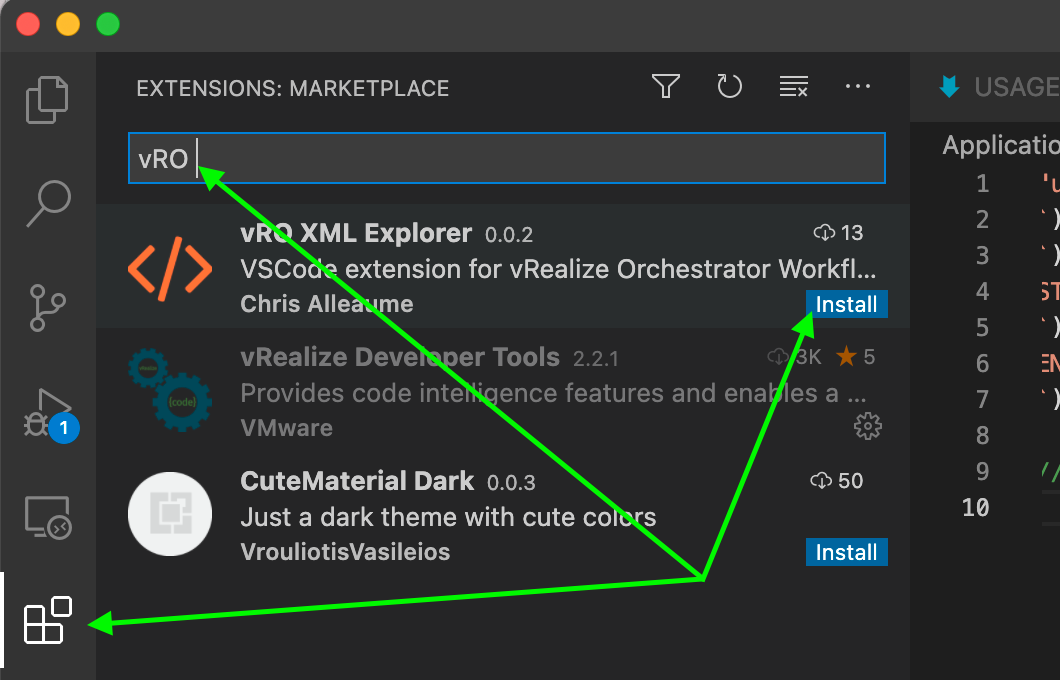
Open VSCode, click on the Extensions tab, and search for “vRO XML Explorer”. It should look like this:

Go ahead and install it.
Once installed, follow these steps to use it properly:
Ensure that your vRO instance has pushed its latest code to your git repo
git pull your vRO repo locally
Open that folder with VSCode
Navigate through the Actions or Workflows folders and find an XML file to edit

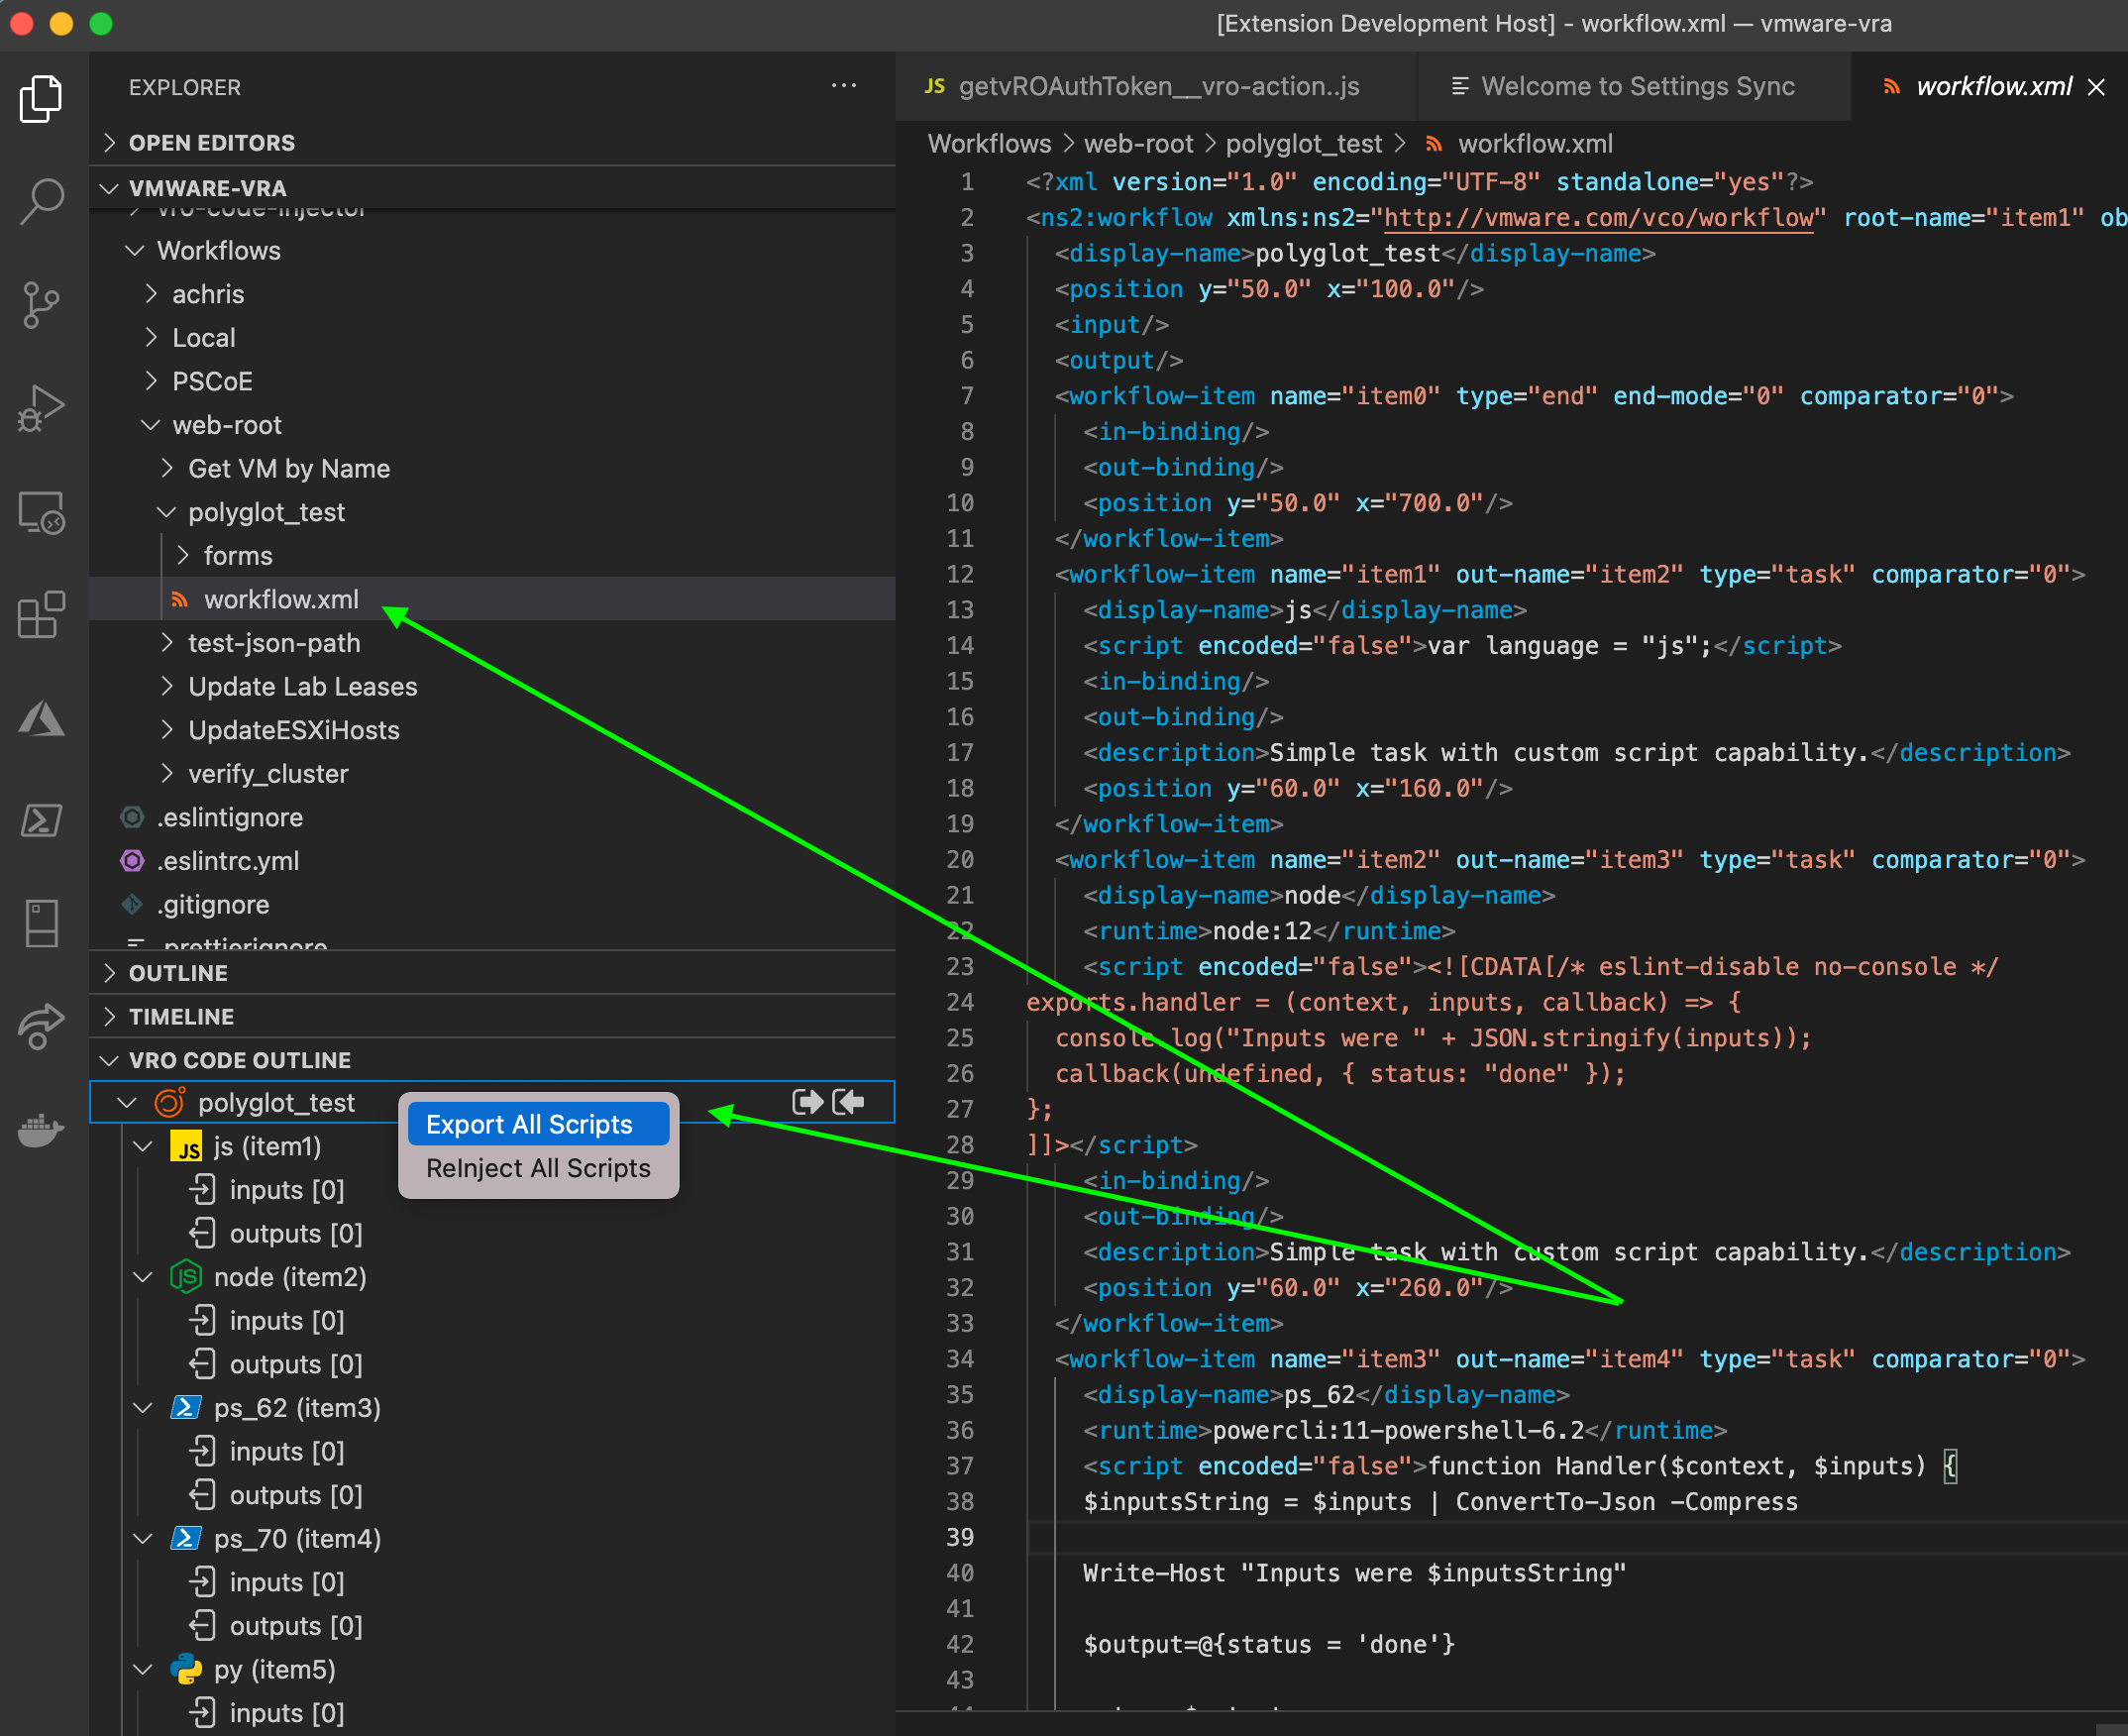
Once you click on that XML file, the vRO XML Explorer should pop open in the panes underneath your file explorer
Browse through the scriptable elements of the Workflow / Action XML
Extract a single script or all associated scripts (either right-click the workflow or script element, or use the icons in the vRO Code Outline window)
This will open the newly extracted temporary file(s). Make your edits.
Reinject the code into the XML (same menu as when you extracted, in the vRO Code Outline window)
This will delete the initially extracted file (since it’s no longer needed)
git commit, git push
Log in to vRO and pull your latest changes from your Repo. Done!
First, who enjoys writing hundreds of lines of code in a web UI where you can’t switch active code tabs?
Second, who loves managing conflicts in vRO? I don’t.
Third, really? You need more than the two above? Okay, how about linting?
Consider this window in vRO - see anything wrong? (I specifically made multiple errors - how many can you count?)

Note that I can close this code window above without warnings, and vRO won’t care until you try to run it, or perform unit tests, or just try to lint it.
The same code in VSCode (using JSLint and prettier, which detected a fair number of the problems):

This is part of a series of posts. Enter the vRO Dojo and learn how to become more proficient by adopting a mature CI/CD approach and implementing a SDLC.
Read MoreThis is part of a series of posts. Learn how to adopt CI/CD practices and a mature Software Development Lifecycle with vRealize Orchestrator and the VMware vRealize Build Tools.
Read MoreLooking for the value to use for VMware.VirtualCenter.OperatingSystem? This article provides a table for the most commonly used operating systems.
Read MoreThis is a retake on an older post of mine but now includes integration information for vRA 7. No more WinRM, no more Downloading and Installing stuff on DEMs. We just execute Powershell via SSH.
This post is seriously cool - it applies to technologies like Puppet, Chef and Ansible too.
In fact, I have some sample Ansible code that shows the use case here too.
Read MoreA simple, easy-to-implement, WinRM-Free solution for executing Powershell over SSH!
No more multi-hop nightmares and CredSSP woes!
Information on how to change the default SSL self-signed cert in a highly available configuration of vRO 6.x Appliances (Not tested on 7.x), using CA issued SAN certs or similar.
Read MoreI decided to clean up my site and remove some of the clutter since I refer to my blog a lot for reference. I figured I'd make it easier on the eyes.
Also very cool is the Search Feature. If you know you saw something you liked on my site, hit the search feature on the right of the page. It's super powerful and the preview mode is really really awesome.
I hope to post a little more information on vRA and vRO soon, as soon as I get a moment to do so.
Happy reading!
--Chris
Part 2, explaining custom integration with Microsoft DNS.
Read MoreA detailed article detailing integration with Microsoft DNS easily; conceptually maintaining a highly available design.
Read MoreIn this post, I'll show you how to assign predefined "cookie cutter" style sizing to a single blueprint, reducing the need for static sprawl. This involves custom properties, property dictionary and a little vRO work.
Hope it helps someone out there.
Read MoreThis article shows you how to reduce or negate blueprint sprawl attributed to having multiple customization specs per environment, or per domain.
It involves some vRO integration, scripting, custom properties and a simple concept.
Read More